Advanced build
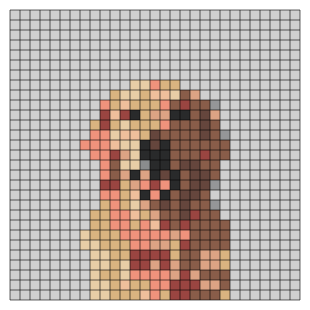
Golden retriever in Artkal colors Perler bead pattern
The golden retriever on the Artkal color card. Artkal has a wider green range, so the background shifts cooler.
- Grid
- 29 × 29
- Colors
- 12
- Beads needed
- 841
- Boards
- One 29×29 board
- Build time
- 3–3½ hours
- Color card
- Artkal
The full chart is above, at actual size. Printing it, or exporting it as a PDF with a shopping list, is a separate step in the Studio — you do not need either to build from this page.
Colors and bead counts
Sorted by how many of each you will need, so the biggest pile goes down first. Codes are Artkal codes.
| Color swatch | Code | Color | Beads |
|---|---|---|---|
| S77 | Light Gray | 561 | |
| S17 | Light Brown | 67 | |
| S113 | Tan | 48 | |
| S02 | Burning Sand | 39 | |
| S154 | Sandy | 27 | |
| S15 | Redwood | 26 | |
| S18 | Sand | 23 | |
| S16 | Brown | 17 | |
| S13 | Black | 16 | |
| S52 | Light Peach | 12 | |
| S07 | Gray | 4 | |
| S159 | Slate | 1 | |
| Total | 841 | ||
Buy a little extra Light Gray — at 561 beads it is the deepest pile on this chart, and it is the shade you run out of first if you sort a few early. A handful of spares covers the bead that slips under the pegboard.
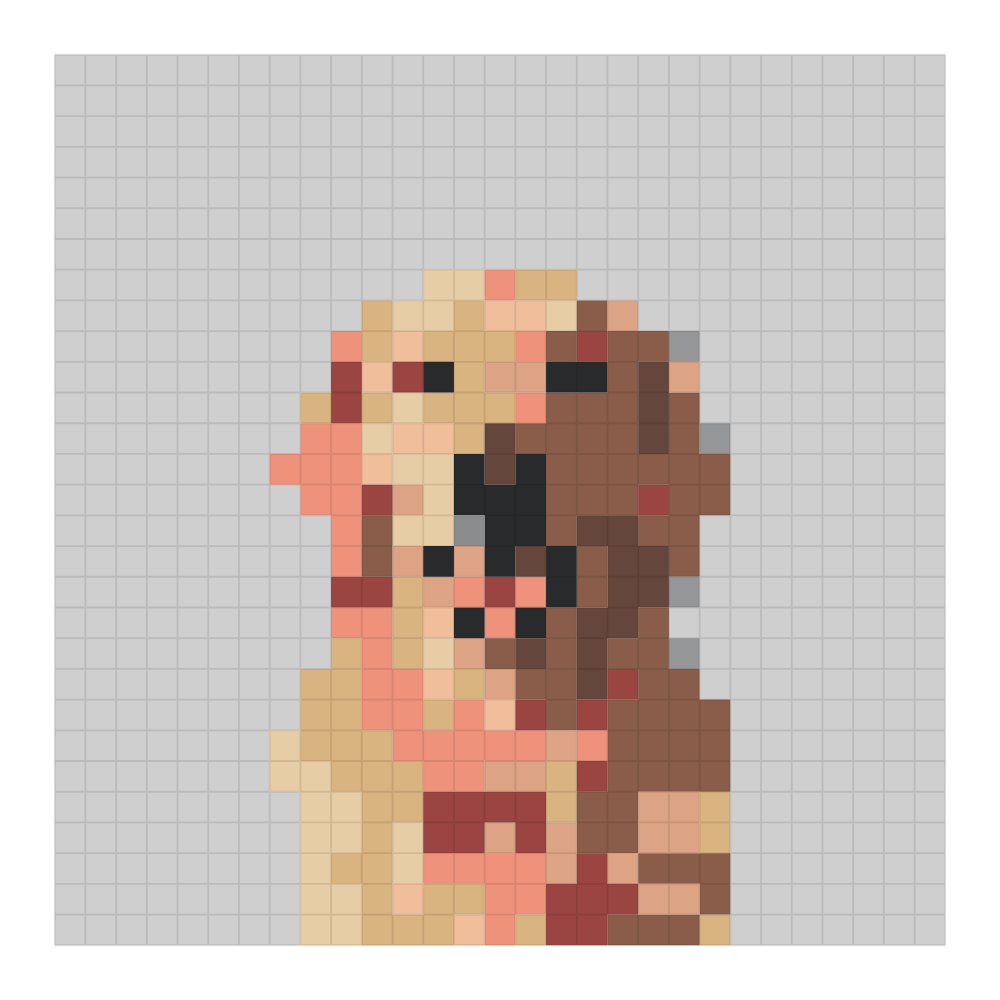
Building it
This is an advanced build by the usual bead-count thresholds — more than 600 beads and more than ten colors. Budget an afternoon, sort every color before you start, and do not leave it half-placed overnight.
- Sort before you place. Make a pile per color using the table above. Ten colors or more, so label each sorted tray with its code from the table above before you start — the difference between a 3 to 3½ hours build and a much longer one is usually the re-sorting.
- Work from the top-left corner. The grid orientation is fixed, so there is no mirroring to figure out. Row by row beats jumping around.
- Iron with parchment. Not wax paper — wax melts and bonds to the beads. Artkal beads fuse very consistently at medium heat around 150 to 170°C, steam off, slow circles, and lift the paper after 10 seconds to check. You want the holes starting to close but still visible.
- Flip and repeat. Both sides means a sturdier piece, which is what a single-board piece wants.
- Cool it flat, then mount it. It reads well on a shelf or taped to a window; no mounting hardware needed.
How this chart was color-matched
The photo was matched to real Artkal beads using the CIEDE2000 formula in CIELAB space, then dithered with Floyd–Steinberg so gradients break into a bead pattern instead of banding. Plain RGB distance fails badly on skin tones and pale shadows, which is where most photo converters give you a flat beige face. Everything here was produced by the Beadful Studio converter — the same tool you can point at your own photo.
Questions about this pattern
How many beads do I need for the golden retriever in artkal colors pattern?
841 beads in 12 colors. That fills the 29 by 29 grid almost completely, because the background is converted along with the subject. A standard 29 by 29 pegboard holds 841 beads and a 58 by 58 four-board layout holds 3,364.
Do I need a specific bead brand?
No. This chart was generated on the Artkal color card, but every 5mm fuse bead brand — Perler, Hama, Artkal, MARD, Nabbi — fits the same grid, and the square boards interlock across brands. Match by color rather than by code, because Perler P01 and Hama H01 are both white but not the same white.
Which pegboard do I need?
One 29×29 board. The pattern is 29 beads wide, which fits a single standard board.
How long does it take to make?
Roughly 3 to 3½ hours of placement at 250 to 300 beads an hour, plus ironing. The larger versions are several hours of work. If this is your first build, do one board in a single session and leave the multi-board pieces for later.
What ironing settings should I use?
Parchment paper rather than wax paper, a dry iron on medium heat around 150 to 170°C, steam off, moved in slow circles. Check after about 10 seconds: the holes should begin to close but still be visible. Fusing both sides gives a sturdier result. Cool it flat under books for five minutes.
Can I change the size?
Yes, and you will need to if your board does not match. Load the photo in the Studio and set the grid width to 29 or 58 — the converter will rebuild the pattern against that grid and recalculate the color list.
Are these patterns free to use?
Yes. Viewing the chart and building from it is free. You do not need an account to look at any pattern on this page.
Other patterns
 Corgi portrait
 Golden retriever portrait
 Shiba portrait
 Corgi portrait, large grid
 Golden retriever, large grid
 Shiba portrait, large grid
Still deciding what to buy?
The bead size guide covers 5mm versus 2.6mm, the color guide explains what 72 and 168 colors really give you, and the board size guide lists every pegboard layout with its bead count and build time.